保护技术开发04 - 自动加壳
到目前为止,我们实现的加壳方案是可以再进一步优化的,针对这点,咱们来聊一聊其中的一些不足之处:我们直接将整个APK文件加密后储存在assets文件夹下,然后其中的资源又拷贝了一份在壳工程中,这就造成了整个加壳后的APK文件非常大,而且我们在加载APK的时候,其实只对其中的Dex进行了加载,并没有加载其中的资源,这一点是因为我们已经把其中的资源都拷贝到壳工程里了,再进一步的想,其实我们做的操作可以等价于只是加了一层Application
加载的文件是APK还是Dex其实也是可以探讨一下的,如果我们加载的是APK,那么完全可以在加载APK的时候,把APK里的资源加载起来,而不需要把资源拷贝到壳工程里,但是这就没有必要了,因为有些资源并不需要保护,所以很少有壳会把那些素材资源也保护起来的,加载Dex是一种比较大众的方法,提取资源,加密Dex,壳运行起来加载Dex,这样可以减少加固后样本的体积,只需要更改两处的代码
第一处修改释放的Dex路径,因为原来的代码把释放的APK和优化后的ODex放在同一个目录,而有一个问题是,系统会以加载的APK或者Dex文件名来命名优化后的ODex文件,所以如果我们加载Dex,就会在同一目录下生成两个一样名字的文件,还会出错,想象一下,原来一个文件夹下有个文件,然后读取它的数据,并写一个同名字的文件进去
File apk = this.getDir("targetApk", MODE_PRIVATE);
File odex = this.getDir("targetOdex", MODE_PRIVATE);
File libs = this.getDir("targetLib", MODE_PRIVATE);
apkPath = apk.getAbsolutePath() + "/targetDex.dex";
第二处修改储存到assets的文件为解压缩出来的classes.dex即可
不知道大家发现没有,其实我们前面的壳代码其实是一样的,因为我们没有做源APK的加解密,所以看起来是比较简单
再仔细思考一下,除了加解密的部分,我们的壳代码是可以通用的,而且也只能通用,因为加固方案是一定的,一个公司有两个加固方案的的话应该就是免费版和商业版,类比现在的第三方加固平台,开发者在上传应用进行加固的时候,并不是传的源码,而是传的APK,那么我们这里进行自动加壳的时候,也需要使用一个打包好的APK进行输入,然后输出一个加固好的APK
整个加固的步骤如下:
- 反编译APK,提取Dex
- 加密Dex,存储到反编译后的assets文件夹,重命名为encryptedDex
- 添加壳Smali代码
- 修改AndroidManifest.xml的Application入口 回5. 编译签名,完成加壳
这里使用Java来写加壳代码,由于反编译APK的工具网络上有很多,所以我们这里仅仅是做一个命令行操作的封装
反编译工具使用ShakaApktool
- https://github.com/rover12421/ShakaApktool
这部分代码参考F8的逆向基础视频第八章加壳部分,那个视频前面讲的不错,从开发开始讲,这种方式也是我比较推崇的,先正向开发再逆向,弄清原理有利于后续自己的知识扩展
首先进行提取的操作,把待加壳文件放到加壳工程根目录,然后导入我们刚才下载的ShakaApktool库
File inapk = new File(inAPKName);
File outapk = new File(outAPKName);
File tmpFolder = new File("apkDecompile");
if (tmpFolder.exists()) {
    tmpFolder.delete();
    tmpFolder.mkdirs();
}
if (!inapk.exists()) throw new Exception("Input APK file does not exist!!!");

System.out.println("开始反编译 " + inapk.getAbsolutePath() + " 到 " + tmpFolder.getAbsolutePath());
System.out.println("--------------------------------------------------------------");

com.rover12421.shaka.cli.Main.main(new String[]{"d", "-s", inapk.getAbsolutePath(),
        "-o", tmpFolder.getAbsolutePath(), "-f", "-df"});

System.out.println("------------------------------反编译完成------------------------------");
这部分的输出,中间的部分是ShakaApktool自带输出
开始反编译 C:\Users\wnagzihxa1n\Desktop\PackAPK\SourceAPK.apk 到 C:\Users\wnagzihxa1n\Desktop\PackAPK\apkDecompile
--------------------------------------------------------------
I: 使用 ShakaApktool 3.0.0-master-f1e0a9f-20160905
I: 正在加载资源列表...
I: 反编译 AndroidManifest.xml 与资源...
I: 正在从框架文件加载资源列表: C:\Users\wnagzihxa1n\AppData\Local\apktool\framework\1.apk
I: 常规资源列表...
I: 反编译资源文件...
I: 反编译 values */* XMLs...
I: 拷贝文件 raw classes.dex ...
I: 复制 assets 和 libs...
I: 复制未知文件...
I: 复制原始文件...
------------------------------反编译完成------------------------------
加密classes.dex拷贝到assets,assets文件夹若不存在则创建,然后删除源classes.dex
File assets = new File(tmpFolder, "assets");
if (!assets.exists()) {
    assets.mkdirs();
}
File sourceDex = new File(tmpFolder, "classes.dex");
File encryptedDex = new File(assets, "encryptedDex");

// System.out.println("\nsourceDexPath : " + sourceDex.getAbsolutePath());
// System.out.println("encryptedDexPath : " + encryptedDex.getAbsolutePath());

System.out.println("\n开始加固");
System.out.println("--------------------------------------------------------------");

System.out.println("I: 加密 classes.dex...");
encryptDex(sourceDex.getAbsolutePath(), encryptedDex.getAbsolutePath());
System.out.println("I: classes.dex 加密完成...");

System.out.println("I: 删除 classes.dex...");
sourceDex.delete();
System.out.println("I: classes.dex 删除完成...");
其中解密的函数encryptDex(),这里的加密算法仅仅是做了一下简单的异或,各位同学可以自己进行扩展
public static void encryptDex(String sourceDexPath, String encryptedDexPath) {
    byte xor_key = 0x66;
    File sourceDex = new File(sourceDexPath);
    File encryptedDex = new File(encryptedDexPath);

    InputStream inputStream = null;
    FileOutputStream fileOutputStream = null;

    try {
        inputStream = new FileInputStream(sourceDex);
        fileOutputStream = new FileOutputStream(encryptedDex);
        byte[] buffer = new byte[1024];
        int index = inputStream.read(buffer);
        while (true) {
            if (index == -1) {
                break;
            }
            for (int i = 0; i < index; i++) {
                buffer[i] ^= xor_key;
            }
            fileOutputStream.write(buffer, 0, index);
            index = inputStream.read(buffer);
        }
        fileOutputStream.flush();
    } catch (Exception e) {
        e.printStackTrace();
    } finally {
        try {
            inputStream.close();
            fileOutputStream.close();
        } catch (Exception e) {
            e.printStackTrace();
        }
    }
}
接着要拷贝壳Smali代码到反编译出来的过程里,此时要注意,我们要根据自己写的加密函数写对应的解密函数,然后再编译出APK,再使用ShakaApktool反编译出壳Smali文件依旧使用前面的工程
释放壳的代码稍微改改就行
public void releaseDexFile() {
    byte xor_key = 0x66;
    try {
        InputStream inputStream = context.getAssets().open("encryptedDex", MODE_PRIVATE);
        File dexFile_save = new File(apkPath);
        FileOutputStream fileOutputStream = new FileOutputStream(dexFile_save);
        int myDexlength = inputStream.available();
        byte[] buffer_temp = new byte[myDexlength];
        inputStream.read(buffer_temp);
        for (int i = 0; i < myDexlength; i++) {
            buffer_temp[i] ^= xor_key;
        }
        fileOutputStream.write(buffer_temp);
        fileOutputStream.flush();
        inputStream.close();
        fileOutputStream.close();
    } catch (Exception e) {
        e.printStackTrace();
    }
}
然后使用ShakaApktool反编译
.\ShakaApktool_3.0.0.jar d -f .\app-release.apk -o SourceAPK
在加壳工程根目录创建smali文件夹,把两个壳文件放进去
System.out.println("I: 拷贝壳 Smali 文件...");
File sourceSmaliFile = new File("smali");
File targetSmaliFile = new File(tmpFolder, "smali");
if (!targetSmaliFile.exists()) {
    targetSmaliFile.mkdirs();
}

File smaliProtectApp = new File(sourceSmaliFile, "ProtectApplication.smali");
File smaliRefInvoke = new File(sourceSmaliFile, "RefInvoke.smali");
File out_smaliProtectApp = new File(targetSmaliFile, "ProtectApplication.smali");
File out_smaliRefInvoke = new File(targetSmaliFile, "RefInvoke.smali");
InputStream in_protectApp = null, in_refInvoke = null;
FileOutputStream out_protectApp = null, out_refInvoke = null;
try {
    in_protectApp = new FileInputStream(smaliProtectApp);
    int len = in_protectApp.available();
    byte[] buffer = new byte[len];
    in_protectApp.read(buffer);
    out_protectApp = new FileOutputStream(out_smaliProtectApp);
    out_protectApp.write(buffer);
    out_protectApp.flush();

    in_refInvoke = new FileInputStream(smaliRefInvoke);
    len = in_refInvoke.available();
    byte[] buffer1 = new byte[len];
    in_refInvoke.read(buffer1);
    out_refInvoke = new FileOutputStream(out_smaliRefInvoke);
    out_refInvoke.write(buffer1);
    out_refInvoke.flush();
    System.out.println("I: 壳 Smali 文件拷贝完成...");
} catch (Exception e) {
    e.printStackTrace();
    System.out.println("I: 壳 Smali 文件拷贝失败...");
} finally {
    try {
        in_protectApp.close();
        in_refInvoke.close();
        out_protectApp.close();
        out_refInvoke.close();
    } catch (Exception e) {
        e.printStackTrace();
    }
}
操作AndroidManifest.xml使用jdom
http://www.jdom.org/downloads/index.html
public static void modifyManifestXML(String ManifestXMLPath) {
    String appKey = "APPLICATION_CLASS_NAME";
    String proxyApp = "com.wnagzihxa1n.sourceapk.ProtectApplication";
    String NAME_SPACE  = "http://schemas.android.com/apk/res/android";
    String NAME_PREFIX = "android";
    String META_DATA = "meta-data";
    String NAME = "name";
    String VALUE = "value";

    File manifestxml = new File(ManifestXMLPath);

    SAXBuilder saxBuilder = new SAXBuilder();
    String oldApplication = null;

    try {
        Document document = saxBuilder.build(manifestxml);
        Element element_root = document.getRootElement();
        Element element_application = element_root.getChild("application");
        Namespace namespace = Namespace.getNamespace(NAME_PREFIX, NAME_SPACE);
        Attribute attribute = element_application.getAttribute(NAME, namespace);
        if (attribute != null) {
            oldApplication = attribute.getValue();
            attribute.setValue(proxyApp);
        } else {
            element_application.setAttribute(NAME, proxyApp, namespace);
        }

        if (oldApplication != null) {
            element_application.addContent(new Element(META_DATA).setAttribute(NAME, appKey, namespace).setAttribute(VALUE, oldApplication, namespace));
        }

        XMLOutputter XMLOutput = new XMLOutputter();
        XMLOutput.output(document, new FileOutputStream(manifestxml));

    } catch (Exception e) {
        e.printStackTrace();
    }
}
回编译
com.rover12421.shaka.cli.Main.main(new String[]{"b", tmpFolder.getAbsolutePath(), "-o", outapk.getAbsolutePath(), "-f"});
跑起来
开始反编译 C:\Users\wangz\Desktop\PackAPK\SourceAPK.apk 到 C:\Users\wangz\Desktop\PackAPK\apkDecompile
--------------------------------------------------------------
I: 使用 ShakaApktool 3.0.0-master-f1e0a9f-20160905
I: 正在加载资源列表...
I: 反编译 AndroidManifest.xml 与资源...
I: 正在从框架文件加载资源列表: C:\Users\wangz\AppData\Local\apktool\framework\1.apk
I: 常规资源列表...
I: 反编译资源文件...
I: 反编译 values */* XMLs...
I: 拷贝文件 raw classes.dex ...
I: 复制 assets 和 libs...
I: 复制未知文件...
I: 复制原始文件...
------------------------------反编译完成-----------------------

开始加固
--------------------------------------------------------------
I: 加密 classes.dex...
I: classes.dex 加密完成...
I: 删除 classes.dex...
I: classes.dex 删除完成...
I: 拷贝壳 Smali 文件...
I: 壳 Smali 文件拷贝完成...
I: 修改 AndroidManifest.xml...
I: AndroidManifest.xml 修改完成...
------------------------------加固完成:)-----------------------

开始回编译
--------------------------------------------------------------
I: 使用 ShakaApktool 3.0.0-master-f1e0a9f-20160905
I: 编译 smali 到 classes.dex...
I: 正在编译资源...
I: No resource identifier found for attribute 'roundIcon' in package 'android'
I: No resource identifier found for attribute 'roundIcon' in package 'android'
I: 正在编译apk文件...
I: 复制未知文件/目录...
I: 回编译成功...
I: 加固后的APK路径:C:\Users\wangz\Desktop\PackAPK\pkg_packed.apk
------------------------------回编译完成-----------------------
最后使用工具进行签名,运行起来效果还是可以的,同时使用工具反编译
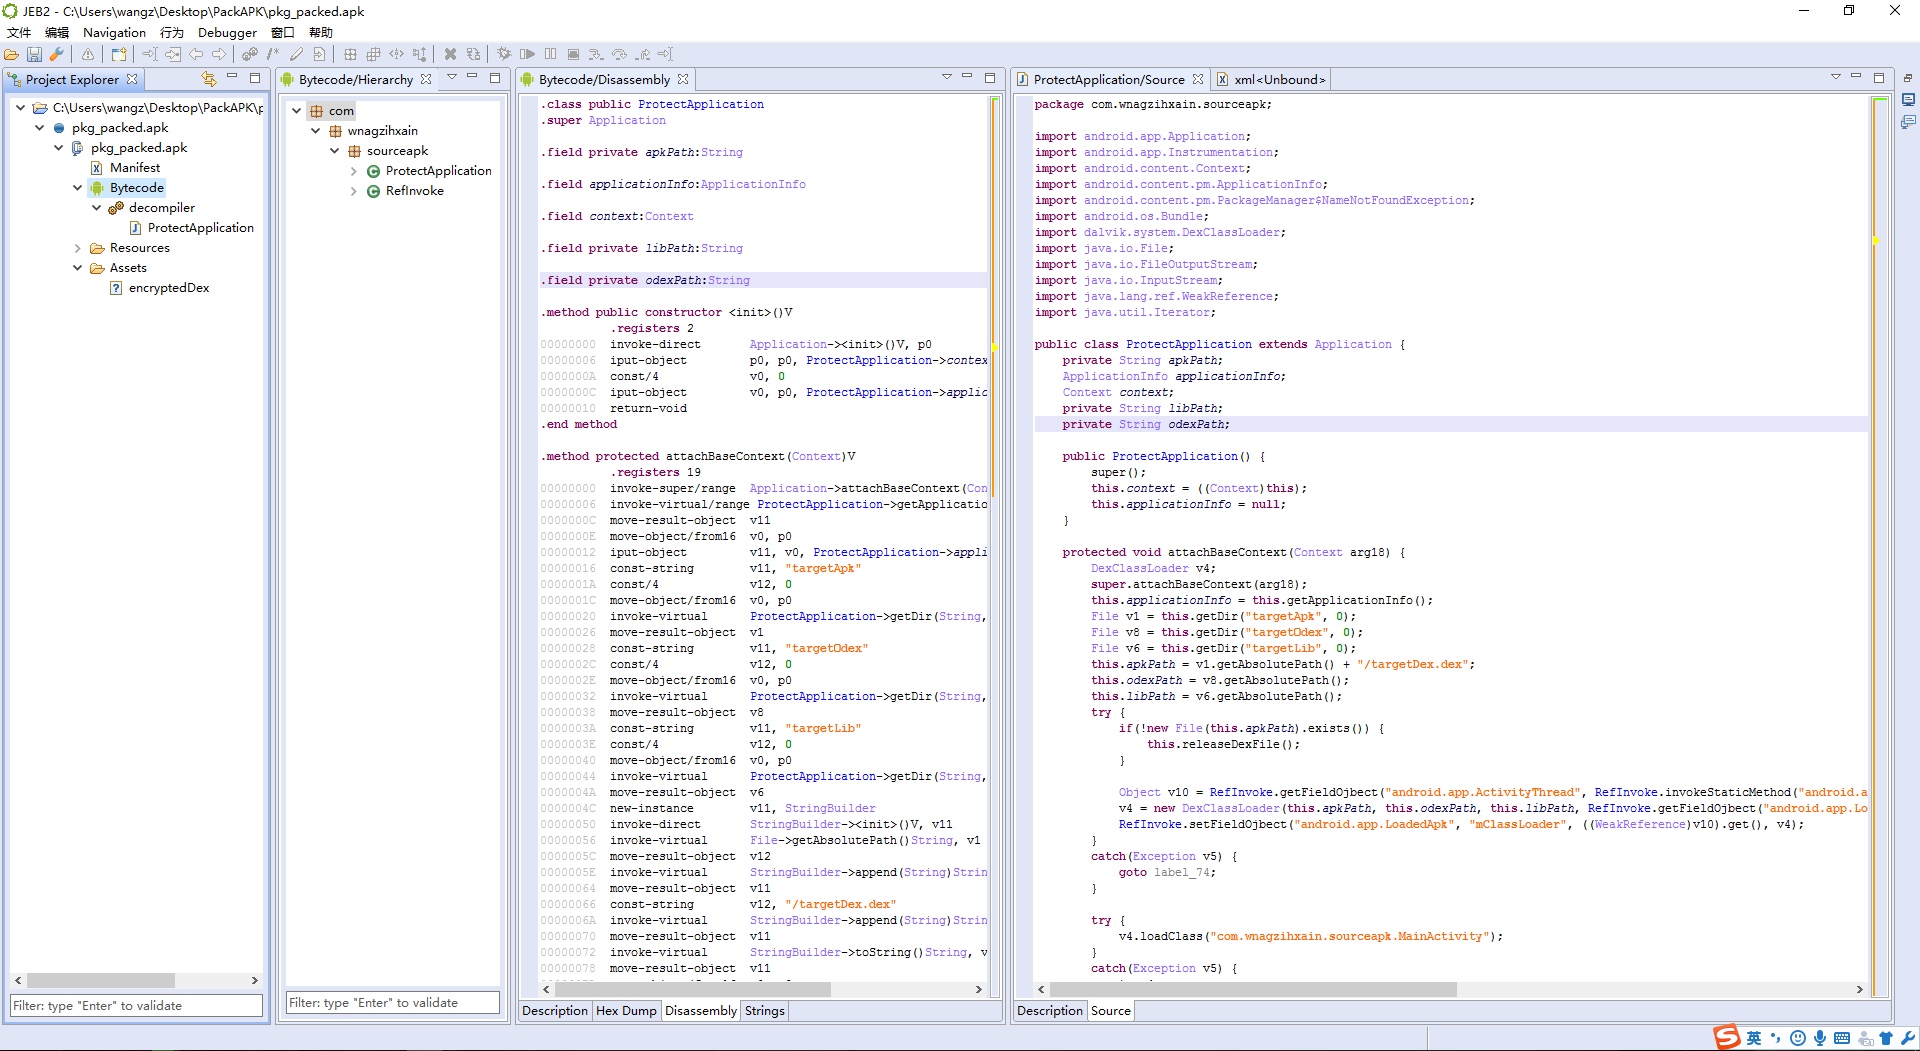
那么我们这里就是实现了一个还算是比较简单的壳,但是呢,这也只是一个壳的雏形,因为这是Java层的实现,比较局限,接下来我们将壳代码移植到Native层,并且会对壳代码进行一定的修改,增加脱壳的难度